
Mozilla 物联网团队最近发布了 Things Framework,它允许您构建使用 Web Thing API 的物联网设备。上周,James 创建了一个 ESP8266 Web Thing。这次,我将向您展示如何使用 Python、Node.js 或 Java 构建 Web Things。这些语言对于小型嵌入式设备肯定不是最佳选择;本教程适用于能够轻松运行这些语言的高端设备,甚至您的台式电脑。
为了演示,我们将把 Music Player Daemon (MPD) 变成一个 Web Thing。我们将在此处使用的库是 webthing-python、webthing-node 和 webthing-java。
Music Player Daemon (MPD) 简介
Music Player Daemon 是一款开源音乐播放器,自 2003 年以来一直存在。MPD 以客户端/服务器模式运行,可以通过简单的基于文本的协议通过 TCP 进行控制。我不会在这里介绍安装,但 MPD 可以通过 Linux 上的包管理器、Mac OS X 上的 Homebrew 或通过 Windows 上的二进制文件 进行安装。
一些快速说明
虽然此示例是为 MPD 编写的,但它很容易移植到其他具有 API 的音乐播放器,或者您可以使用此示例作为基础构建自己的播放器。更重要的是,此示例主要旨在演示 Things Framework,该框架可用于创建各种各样的 Web Things。
Python、Node.js 和 Java Web Thing 库都具有基本相同的 API。虽然它们可能并非完全符合各自语言的习惯用法,但这样做使我们能够更轻松地维护所有库,这在 Web Thing API 仍然是活动草案时非常有价值。
入门
首先,为您的选择的语言初始化一个空项目。例如,您可以在 IntelliJ IDEA 中为 Java 创建一个新项目,或运行 npm init 以启动一个新的 Node.js 项目。然后,您需要将 webthing 库添加为依赖项。有关执行此操作的说明可以在相应的 Github 项目页面上找到,或者您可以 查看此处。
现在我们准备编写一些代码。基本上,我们将执行以下操作
- 创建一个
Thing。- 定义其属性。
- 定义其操作。
- 定义其事件。
- 将
Thing附加到WebThingServer。
创建 Thing
首先,让我们导入我们选择的库。
from webthing import Action, Event, Property, Thing, Value, WebThingServerconst {
Action,
Event,
Property,
Thing,
Value,
WebThingServer,
} = require('webthing');import org.mozilla.iot.webthing.Action;
import org.mozilla.iot.webthing.Event;
import org.mozilla.iot.webthing.Property;
import org.mozilla.iot.webthing.Thing;
import org.mozilla.iot.webthing.Value;
import org.mozilla.iot.webthing.WebThingServer;现在,我们将创建一个 Thing 的基本子类。
class MPDThing(Thing):
    def __init__(self):
Thing.__init__(self, 'MPD', 'musicPlayer', 'Music Player Daemon')class MPDThing extends Thing {
constructor() {
super('MPD', 'musicPlayer', 'Music Player Daemon');
}
}public class MPDThing extends Thing {
public MPDThing() {
super("MPD", "musicPlayer", "Music Player Daemon");
}
}添加属性
现在我们有了 MPDThing,我们需要向其中添加一些属性。显然,音乐播放器将有很多属性。为了演示,我将向您展示如何添加一个,并在本文末尾链接到其余代码。
要添加属性,您可以在 MPDThing 构造函数中执行以下操作。
status = self.get_status()
self.add_property(
    Property(self,
             'volume',
             Value(self.get_volume(status), self.set_volume),
             metadata={
                 'type': 'number',
                 'description': 'Playback volume',
                 'minimum': 0,
                 'maximum': 100,
}))this.getStatus().then((status) => {
this.getVolume(status).then((v) => {
this.addProperty(
new Property(this,
'volume',
new Value(v, this.setVolume.bind(this)),
{
type: 'number',
description: 'Playback volume',
minimum: 0,
maximum: 100,
}));
});
});ServerStatus status = this.client.getServerStatus();
Map<String, Object> volumeMetadata = new HashMap<>();
volumeMetadata.put("type", "number");
volumeMetadata.put("description", "Playback volume");
volumeMetadata.put("minimum", 0);
volumeMetadata.put("maximum", 100);
this.volumeValue =
new Value(status.getVolume(), v -> this.setVolume((int)v));
this.addProperty(new Property(this,
"volume",
this.volumeValue,
volumeMetadata));我们现在创建了一个 Property,它允许我们获取和设置播放音量。Value 部分是一个对象,它基本上存储一个缓存值和一个“值转发器”回调。当通过 PUT 请求设置音量时,值转发器用于将新值转发到实际设备,在本例中为 MPD 服务器。我们还为该属性设置了一些元数据,包括描述、值类型以及最小值和最大值。
添加操作
音乐播放器也可以有很多操作。虽然 MPD Web Thing 有一些基本操作,如播放、暂停和跳过,但我添加了一个需要一些额外输入的操作,它将把一系列随机歌曲排队。操作输入使用 JSON Schema 验证器 进行验证。
首先,让我们创建一个 Action 子类。
class QueueRandomAction(Action):
    def __init__(self, thing, input_):
        Action.__init__(
            self, uuid.uuid4().hex, thing, 'queueRandom', input_=input_)

    def perform_action(self):
        songs = self.thing.list()
        if songs:
            for _ in range(0, int(self.input['count'])):
                self.thing.add(random.choice(songs))

            playlist = self.thing.get_playlist()
            if playlist is not None:
                self.thing.add_event(
PlaylistUpdatedEvent(self.thing, playlist))class QueueRandomAction extends Action {
constructor(thing, input) {
super(uuidv4(), thing, 'queueRandom', input);
}
performAction() {
return this.thing.list().then((songs) => {
const promises = [];
if (songs) {
for (let i = 0; i < this.input.count; ++i) {
const uri = songs[Math.floor(Math.random() * songs.length)].file;
promises.push(this.thing.add(uri));
}
promises.push(this.thing.getPlaylist().then((playlist) => {
if (playlist) {
this.thing.addEvent(new PlaylistUpdatedEvent(this.thing, playlist));
}
}));
}
return Promise.all(promises);
});
}
}public static class QueueRandomAction extends Action {
public QueueRandomAction(Thing thing, JSONObject input) {
super(UUID.randomUUID().toString(), thing, "queueRandom", input);
}
@Override
public void performAction() {
MPDThing thing = (MPDThing)this.getThing();
Random random = new Random();
List<MPDFile> songs = thing.list();
for (int i = 0; i < this.getInput().getInt("count"); ++i) {
MPDFile file = songs.get(random.nextInt(songs.size()));
thing.add(file);
}
String playlist = thing.getPlaylist();
thing.addEvent(new PlaylistUpdatedEvent(thing, playlist));
}
}QueueRandomAction 获取一个输入 count,将该数量的随机歌曲排队到当前播放列表中,然后发出一个 PlaylistUpdatedEvent(稍后定义)。要将此新操作添加到我们的 MPDThing 中,请在 MPDThing 构造函数中执行以下操作
self.add_available_action(
    'queueRandom',
    {'description': 'Queue a series of random songs',
     'input': {
         'type': 'object',
         'required': [
             'count',
         ],
         'properties': {
             'count': {
                 'type': 'number',
                 'minimum': 1,
             },
         },
     }},
QueueRandomAction)this.addAvailableAction(
'queueRandom',
{
description: 'Queue a series of random songs',
input: {
type: 'object',
required: [
'count',
],
properties: {
count: {
type: 'number',
minimum: 1,
},
},
},
},
QueueRandomAction);Map<String, Object> queueRandomMetadata = new HashMap<>();
queueRandomMetadata.put("description",
"Queue a series of random songs");
Map<String, Object> queueRandomInputMetadata = new HashMap<<>();
queueRandomInputMetadata.put("type", "object");
queueRandomInputMetadata.put("required", new String[]{"count"});
Map<String, Object> queueRandomInputPropertiesMetadata =
new HashMap<>();
Map<String, Object> queueRandomInputPropertiesCountMetadata =
new HashedMap();
queueRandomInputPropertiesCountMetadata.put("type", "number");
queueRandomInputPropertiesCountMetadata.put("minimum", 1);
queueRandomInputPropertiesMetadata.put("count",
queueRandomInputPropertiesCountMetadata);
queueRandomInputMetadata.put("properties",
queueRandomInputPropertiesMetadata);
queueRandomMetadata.put("input", queueRandomInputMetadata);
this.addAvailableAction("queueRandom",
queueRandomMetadata,
QueueRandomAction.class);添加事件
我们 Thing 的最后一部分是它的事件。由于 MPD 是客户端/服务器模型,因此它可以被任意数量的其他客户端从外部更新。因此,我创建了一个事件,当当前播放列表更新时会触发该事件。
与 Thing 和 Action 一样,我们将创建一个 Event 子类。
class PlaylistUpdatedEvent(Event):
    def __init__(self, thing, data):
Event.__init__(self, thing, 'playlistUpdated', data=data)class PlaylistUpdatedEvent extends Event {
constructor(thing, data) {
super(thing, 'playlistUpdated', data);
}
}public static class PlaylistUpdatedEvent extends Event {
public PlaylistUpdatedEvent(Thing thing, String data) {
super(thing, "playlistUpdated", data);
}
}这是一个基本的 Event。数据成员将填充当前播放列表的字符串表示形式。
要将此 Event 添加到我们的 Thing 中,我们将在 MPDThing 构造函数中执行以下操作
self.add_available_event(
    'playlistUpdated',
    {'description': 'The current playlist has been updated',
'type': 'string'})this.addAvailableEvent(
'playlistUpdated',
{
description: 'The current playlist has been updated',
type: 'string',
});Map<String, Object> playlistUpdatedMetadata = new HashMap<>();
playlistUpdatedMetadata.put("description",
"The current playlist has been updated");
playlistUpdatedMetadata.put("type", "string");
this.addAvailableEvent("playlistUpdated", playlistUpdatedMetadata);创建 WebThingServer
现在我们有一个具有属性、操作和事件的 Thing,我们将创建一个 WebThingServer 并将 MPDThing 附加到它。
thing = MPDThing()

server = WebThingServer([thing], port=8888)

try:
    server.start()
except KeyboardInterrupt:
server.stop()const thing = new MPDThing();
const server = new WebThingServer([thing], null, 8888);
process.on('SIGINT', () => {
server.stop();
process.exit();
});
server.start();MPDThing thing = new MPDThing();
List<Thing> things = new ArrayList<>();
things.add(thing);
try {
WebThingServer server = new WebThingServer(things, null, 8888);
Runtime.getRuntime()
.addShutdownHook(new Thread(() -> server.stop()));
server.start(false);
} catch (IOException e) {
System.out.println(e);
System.exit(1);
}控制 Web Thing
我们的 Web Thing 已完成,现在可以通过 Web Thing API 进行控制。以下是如何将其添加到 Things Gateway 中
-

- 空的 Things 屏幕

-
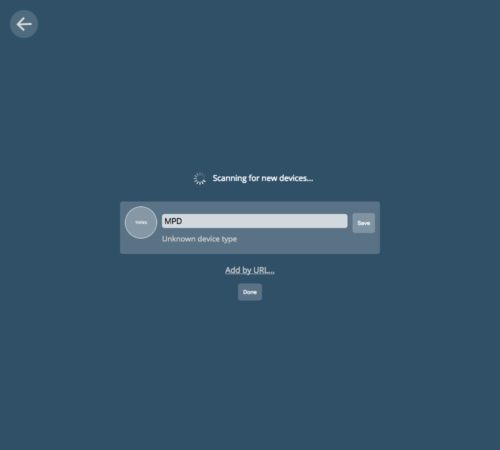
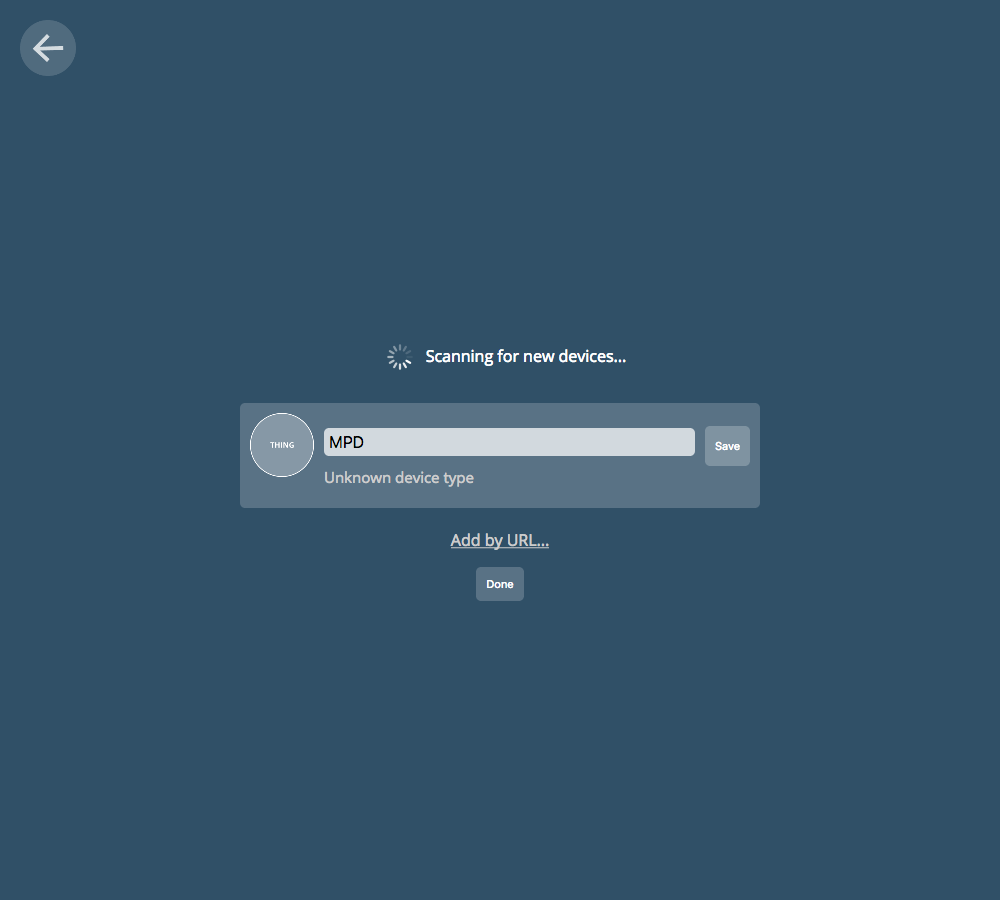
- 添加新的 Thing
-

- 显示新的 Thing

-
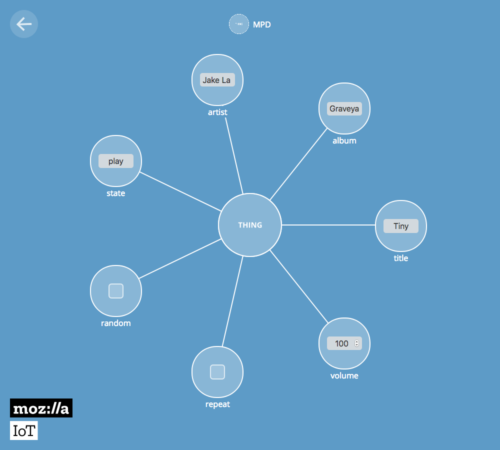
- 扩展的 Thing UI

Things Gateway 目前不提供使用操作或显示事件的方法,但这些功能正在开发中。
或者,您可以通过 cURL 或您选择的任何其他 HTTP 库来控制 Web Thing
$ curl \
    -X POST http://127.0.0.1:8888/actions \
    -H 'Content-Type: application/json' \
    -d '{"play":{}}'
总结
您真正可以将任何东西变成 Web Thing,这仅受您的想象力限制。如果您想查看此示例的其余部分以及如何实现实际的 MPD 控制,所有代码都 在 Github 上可用。
如果您有任何问题或建议,您可以访问 Discourse 或在 irc.mozilla.org 上的 #iot 中找到我们。此外,请随时在 webthing 库存储库中创建问题,或者更好的是,提交请求请求!
关于 Michael Stegeman
Michael 是 Mozilla 的软件工程师,负责 WebThings。
一条评论